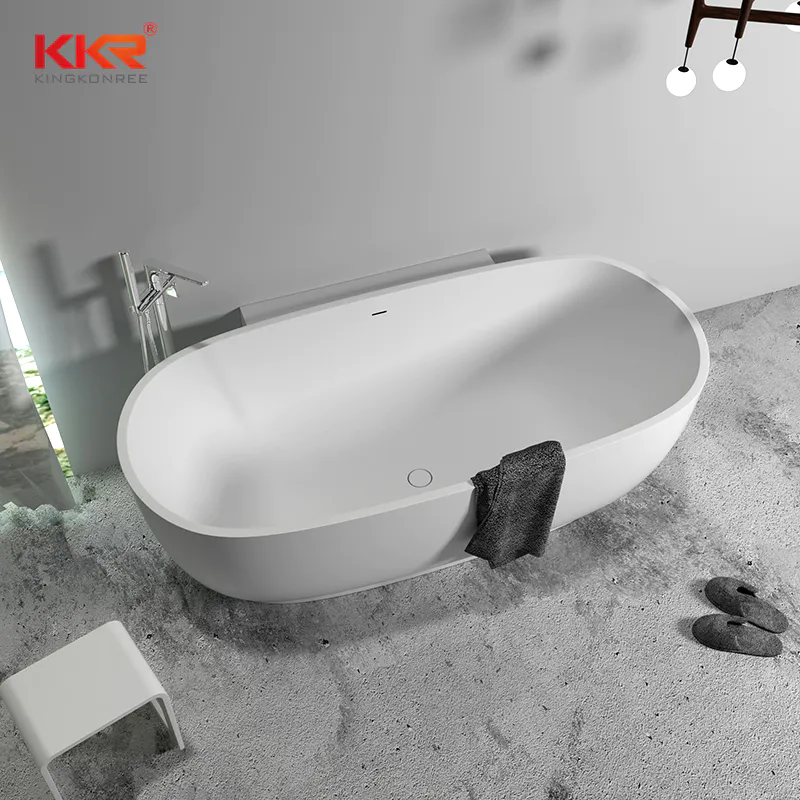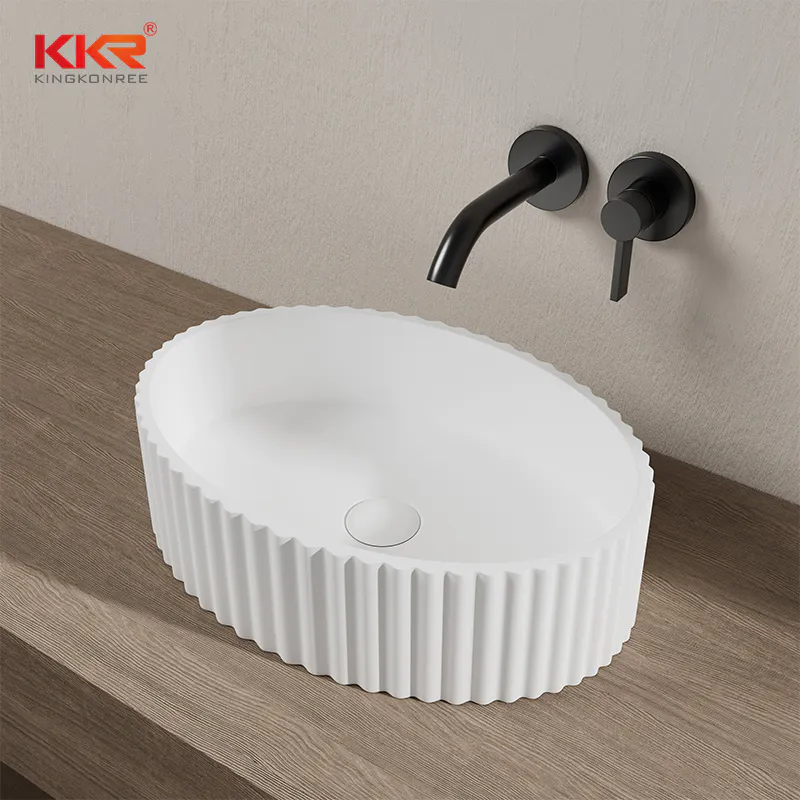

What Height Should A Wash Basin Be?
pplanter urinal, sink, + planter!
by:KingKonree
2020-10-25
PPlanter is a rapid deployment, refactored public urinal and sink for the treatment of urine and wastewater using modular biological filters.
Sensor networks and responsive web applications for automatic monitoring enable the public to feedback and participate in the design of future iterations.
The project is one of the rapid deployment urban green infrastructure prototype toolbox designed by Hyphae design lab in collaboration with non-Hyphae
City bio filter.
Transform your street, community or city!
Let the public urinate more actively!
Next: List of materials.
Planter parts: 2 or more pallet low density polyethylene bulk boxes with metal support structure? ? )
Signage/door materials (
PolyproRailsLDPE sheetRear lock screen mechanism of SinkPET in the door urine pool-
G-small enough urinal, sink, sink screenMDF private moldWood glueEcourinal CartridgeFoot-trap (
U tube under sink)
Hose for fresh water supply pipe for gray water, threaded to P-
One end trap, the other end of the urine/gray water urine/sink on the filter medium of the gray water tank (s)
-1, partition or 2: filter area storage area water tank or connection directly from urine/ash water tank hoseLower pump to fresh water supply pump from pump hose to blulocblulock pipe
As long as its diameter is the same! )
Bring gray water and urine to plantersPipe accessories [Elbows (4? ),Ts,Blu-
Lock to male thread connector (2, or more)
Female thread plug]
Hose flap line cleaning accessories (backwash? )
Sensor/Electrical: micro controller (Arduino Uno)
Level float sensor (4 or more)
Infrared distance sensor (3 or more)Push button (1)
LED light flow meter urine/ash water occurrence line for fresh water use, crocodile clipsPlexiglass case for electronic linux WiFi shield12V batterySolar PV panel inverter (12V to 120V)
Indoor lighting for urinal/sinkWiring for indoor lighting: towel rack or towel dispenser
Zall or JigsawDrill submit the following documents and materials :[
Put bolts/screws into small bits in plastic, put bolts/screws into small bits in plastic through metal, cut holes into small bits in plastic, screwdriver position corresponding to any size/head screw you use]
Electric sanding tools, small grinding machines and/or DremmelSand paper printers, capable of printing on low-density polyethylene or vinyl materials.
Cut off the top of the 2 block bins: this may require temporary removal of the metal holder).
The cut sides are smooth. 2.
Install the gray water input plug into the root area (
3/4 \"or 1\" thread for Blu-raylock fitting)
A big warehouse.
Other bulk bins will be used for sinks and urinal. 3.
Put a transparent pipe with a diameter of 5 \'long 2\' into the bulk bin to make it vertical.
Should be near a corner of the big warehouse.
Install the irrigation pipe attached to the plug that allows the ash water/urine to be dispersed to 4.
Add a layer of gravel (1’ thick)
, Make sure the pipe stays vertical in the corner of the container.
Add a layer of soil (2. 5’ thick)
: This should fix the pipe in place-again make sure it is vertical. 6. Plant bamboo! 7.
Top irrigation and drip irrigation tube (optional)8. Top with mulch. 9.
Get one or two more. -
The more bamboo you plant, the more privacy you have!
In addition, you can try willow trees or other nutritious plants at will. . .
Study which plants are the best choice for salttolerant too. 1.
Glue the 12 inch thick medium fiber board together (
Warning: the resulting sheets will be very heavy! )
Use the glue and let it dry.
Note: work quickly when stacking and gluing each layer of mid-fiber board: before quickly putting the next sheep on top and applying pressure, try to spread it out with a tool, cover the entire fiber board with a uniform layer of wood glue.
Don\'t worry if the glue oozes out of the edge-you can wipe it off if you want, but it doesn\'t affect the CNC router or mold. 2.
Use the CNC router to cut the mold of the sink urinal using our model file! 3.
Sand mold as smooth as possible! 1. Vacuum-form PET-G in molds (
We went to the tech store and trained to do so! )2.
Cut holes at the bottom of the sink and urinal to accommodate In3. Paint Urinal (
Behind/below only!
So that the front will shine)
Paint and sink if needed (
Sink may stay clean)4.
Add drain: if the cut size is just right and you are using a thin rubber gasket and a good plumbing adhesive, you can add the waterless urinal box to the urinal.
The sink drain also requires a small/thin rubber gasket and a pipe adhesive.
If you want it to be a sensing device, find out your sensor as early as possible.
Before installing an infrared sensor or a sensor measuring the distance, you need to make sure that they are all accurate.
We will provide Arduino/sensor code here soon! 1.
When people are nearby, test the infrared sensor for sensing.
In a place where people often pass by or stand in front of them for a short time.
For example, the kitchen or bathroom sink, the water dispenser in the office, the coffee machine or the vending machine are all good options. 2.
Flow rate sensor: Please try the following instructions to measure the flow rate of the urinal and sink.
We didn\'t use this in the original version, but it would be nice!
You can put the flow rate sensor in the fresh water pipe leading from the foot pump to the tap and in the hose connected to the outlet of the urinal cartridge. 3.
The level you need to measure includes the level in the urine/tank (
Bulk container if terrarium option is used)
, The liquid level in the fresh water tank and the liquid level in the flowerpot (s). a.
The liquid level float sensor should be placed where there is enough liquid in the urine/water tank to ensure that the pump is turned on.
Once the float rises, it will trigger the pump to start. b.
The level float sensor should be located at the bottom of the fresh water tank: In this case, an alarm is triggered once the float drops (
When the water is almost gone and the tank needs to be refilled.
Ideally, there can also be an open pump, or a valve that will open to fill the tank once needed. c.
Another level sensor should be placed in the planter (s)
Make sure they are not overly saturated and there is no risk of a bad smell.
For this purpose, the soil moisture meter is an option, or simply use a perforated pipe on the side (
You should have installed the flowerpot when you build it)
And the infrared or distance sensor placed on the top of the pipe.
Once the level is short enough from the sensor, an alarm is issued to the PPlanter technician. 4.
Connect and code the sensor using Arduino.
Test all of this to make sure the distance range is correct and the float is working.
The code is coming soon!
In the meantime, here are some links to try:
Tape liquid level sensor description: liquid level sensor video: sensor Tutorial: cut holes in the sink, urinal and repair door using a thin saw or dremmel cutting tool, and then smooth edges by sanding.
Carefully cut the exact shape of your urinal.
First cut a smaller hole, partially insert the sink/urinal and then cut a more accurate hole.
Install air filter:.
Cut out the diameter of a 3 \"transparent pipe in the upper part of the back of the bulk bin container.
The back is the side of the container, opposite the side used by the sink.
Make sure to cut precisely so that the pipe can slide directly-3 \"hole cutter works well in this regard. b. Attach square-
Fix the cylinder piece at one end of the transparent pipe to make it tight.
This will allow you to connect the square part to the wall of the bulk container.
Stick the computer fan to the other end of the transparent pipe to ensure that there is no gap (i. e.
All the air in the tube goes directly through the fan)d.
Filter bag or x-
Large sock legs with granular carbon, then fill the carbon bag inside the transparent pipe/tubee.
Drill at least 4 holes in the bulk container and drill the corresponding holes in the square part of the squareCylinder parts (
Connect to your pipe).
Connect the piece/tube to the wall of the container using bolts.
The fan end of the pipe should be inside the bulk bin container, the carbon inside the pipe, and the pipe attached to the container hole. f.
Attach a piece of window yarn or wire mesh to the outlet of the pipe and lean against the outer wall of the bulk bin.
3 Installation of infrared sensor:.
Install the infrared sensor next to the hole that the urinal will go.
Make sure all the wiring is correct! 4.
Wiring your exhaust fan! 5.
Connect any optional lights you choose to include: the lights inside the container will produce interesting glowing effects! 6.
Install the urinal: when a person keeps the urinal from the inside in the appropriate position, drill through the urinal edge and the overlapping edge of the container, and then use the 1/8 \"Bolt to connect the urinal to the container
3/4 or in length)+ lock nuts. 7.
Connect the sink to the container using the same program. 1.
Install the faucet behind the sink and use the appropriate size sink hose to connect the faucet inlet to the outlet end of the pump.
Connect the second hose to the inlet end of the foot pump (
There should be a nipple connection for a clear hose)
, Then place the other end of the hose at the bottom of the fresh water tank.
The faucet should work if you use the foot pump now!
Check now for leaks or problems. 3. Attach U-
Sink Drain (
Female to female adapter or other parts may be required)
, And add vents to the pipeline after the United States4.
Connecting the other end of Upipe (after vent)
Hose connecting the ash water inlet of the urinal (
Don\'t worry about this step if you have purchased a ready-made urinal instead of using our model-just transfer the sink wastewater (greywater)
Combine urine/water tanks/filters together using hoses or pipes.
If using terr, it is better to transfer to multiple outlet points). 5.
Find the tube of the right size to connect to the outlet of the waterless urinal cartridge and glue it in place with a pipe adhesive.
Connect the urinal tube to the urine/water filter/water tank or terr according to the method used (View the following steps).
If you would like to use a tank instead of turning your bulk bin into a glass container, please use the following instructions!
This is not what we did for our first PPlanter prototype, so we don\'t have a picture:1.
Upper part-barrel, lower part-tank.
Make sure the barrel nest inside the tank, leaving at least 45 cm of space between the bottom of the bucket and the bottom of the tank.
If not, make the wide edge of the bucket with thin plywood or thick plastic (
Cut a hole in the sheet and throw the bucket into the hole so it is stable and supported by the hole)2. Punch 0.
The bottom of the barrel has a hole of 5 cm in diameter, and then the barrel nest (
Or barrel/plywood Assembly)into the tank. 3.
Using a hole cutter, cut a hole on the side of the tank that is the same size as the outlet pump hose.
Stick the screen to the end of the pump hose and insert the shield hose into the side of the tank. 4.
Fill the tank bottom with a course gravel or rock of about 5 cm deep, then fill the tank top with fine/pea gravel, and then fill the tank top with ceramic, activated carbon particles, zeolite particles and covering.
All layers should be greater than 3-5 cm thick. 5.
The pump inlet shall be attached to the urine/water tank/filter and the pump itself shall remain in the bulk bin container.
Layered filter media at the bottom of the bulk container, as well as plants with herbs of your choice or hardy plants.
Be sure to use it well --
Or ammonia adsorbed mineral particles!
Installation of privacy screen: 1.
As shown in the figure, cut the plastic pieces from the privacy screen. 2. Paint screen3.
Connect the screen to the bulk bin container. 4.
If people wash their hands while someone is peeing, it will make a big difference!
Custom message
Related Products